Thursday, April 14, 2011
Last Day for Week 2 Blogiversary Giveaway!
Don't forget that today is the last day to enter to win the Jelly Roll Market Tote and Sunkissed Charm pack for week 2 of my Blogiversary Giveaway! Go here!
And be sure to check back on Friday, because I have something planned that I think you'll really like.
Have a great Thursday!
Wednesday, April 13, 2011
And We Have A Winner!
Well, I've been hinting about a special something for someone who made a comment on my 100th post, but only one person took the hint... at least on the right post. Ellyn, recent winner of the Stylish Blogger Award (see my post here and Stephanie's post here), is also the winner of my 100th Anniversary Post surprise for commenting on my Scrapbuster Saturday post, my 100th post in Blogland.
Your "surprise" is the very market bag I made for the tutorial on that post. I hope you like it.
Congratulations, Ellyn! If you'll email me your address, I'll get your surprise in the mail.
It is somewhat ironic to me that I reached my 1-year blogiversary, my 100th post, and my 200th Flickr photo within 10 days of each other. It was totally random, unplanned, and downright coincidental. Must be a convergence of the planets or the crafty muse's influence or something.
Anyway, I am really enjoying this adventure into craftiness, and the outlet that Flickr and the blog add to that. I think my skills have really stretched since my first couple of swaps. I am much more willing to try new things now than I was before, and I think that's a good thing. I was pretty much stuck in a rut. But I have created - and received - a lot of fun crafty items, and it is propelling me to improve.
I thought I'd take a look back over the last 3 months at the yummy craftiness I've received...
![]() | |
| Pillow Talk Swap from Lexiloo |
![]() | |
| Spicing Up the Kitchen Swap from miniature quilter |
![]() | |
| Charm Squares galore from the Chronic Seamstress Charm Square Swap |
![]() |
| Some cool fabric postcards from the Fabric Postcard Swap |
![]() |
| Organizers from Etoile2b in the Urban Home Goods Swap |
![]() | |
| Pot Holders from sweetteamom in the PP6 swap |
![]() |
| Beautiful Hexie Flower Blocks from my friends in the First Time Bee |
![]() |
| Fabric, Hoop, Sewing Machine Cover and other yumminess from Suzettra in the Make Mine Modern Swap |
Did I forget anything. I don't know. There's been so much craftiness going on, until getting the mail has become something of an event.
And I've created a few things I'm proud of along the way. I've learned that it's ok to submit an idea and get feedback - and if the feedback doesn't elicit exactly the response I desired, it's ok to start again... and again... and maybe even again, until I come up with something that works.
So I'm enjoying this venture into the online sewing and quilting community. I hope you are too.
Tuesday, April 12, 2011
Who? Me?
Don't forget to enter my Blogiversary Giveaway - Week Two here:
You may have observed that I've been really concentrating on my little blog lately. Partly because I'm having a blast creating things for bees and swaps, partly because it's a great "diary" of what I've been working on, and partly because I have come to realize that if I'm going to do this bloggy thing, the least I can do is to try to make it worth reading.
Perhaps I am having a bit of success with that last part. Last Sunday, I received an email from Stephanie of Spontaneous Threads that I had won the Stylish Blogger Award. I was so surprised!! I am surprised! I am excited! I am speechless. (Well, I was... It has taken me a whole week to do this post.) Here are the requirements of winning the award:
First, I have to thank the person who bestowed the award on me, and that is easy. Thank you, Stephanie! If you were here, I'd give you a big ol' Southern hug! It is just so kind of you to give my blog this recognition. Stephanie has a great blog too. You should check it out (see the link above - would you just look at that gorgeous sewing machine cover??? Even though I just got a beautiful new cover for my sewing machine cover, I am coveting that one. {Do you think she could be MY partner?} Sewing machine cover greed is what it is, pure and simple, but I don't care...) But I digress...
Next, I must bestow the award on 6 other bloggers, This was the hard part. There are so many wonderful crafty blogs out there that I have enjoyed reading and discovering. But I had to pick 6. Several of my faves have already won the award, including one that I had all but nominated, but someone else posted first. So, after much consternation and deliberation, here are the winners of the (ta da da dum!) Stylish Blogger Award:
1. Aunt Spicy I just love her blog. She is so fantastically creative, and we seem to have so much in common! Check out her amazing quilts and pillows!
2. LRStitched One of my followers told me about this blog, and she has some way cool stuff on there including an easy Dresden tutorial. Check it out.
3. Ellyns Place I just discovered this cool blog. Ellyn is one of my followers since I started my giveaway, so I clicked by her blog and discovered we have so much in common. Loved her Central Park Sudoku quilt.
4. Petite Design Company I've just discovered this blog too, but it's so much fun, I'm sure I'll go back. SUCH beautiful, beautiful quilting! I don't think I'll EVER be able to do FMQ that beautiful!
5. Stitch Duchess A cute blog from a very creative lady. She is hosting a pinnie swap right now, so if you're interested, join me over there.
6. A Crafty Fox This new little blog is just getting started by my oh-so-talented BD#1, but click on over and check out her Matroyshka Doll Quilt. Adorable! I can't wait for her tutorial.
Oh, and that other requirement... I have to tell you 7 things about myself: Here goes...
1. I have a black belt in Karate. (So do 2 of my 3 children {I think HS is a 2nd Degree BB now that I think of it!}. WH and BD#2 are blue belts. I guess it was a family affair.)
2. I once had a private pilot's license.
3. It took me 25 years to earn a Master's Degree. I started it when I was pregnant with my 1st child, and attended my last class on her 25th birthday. I may not be quick, but I persevere LOL!
4. I've been sewing since I was 9, and quilting since, oh, I think it was 1972, but until this year, I never kept (for myself) a quilt that I had made, although I think BD#2 has one around here somewhere. She's coming home today... Maybe we'll get it out and take a picture of it, just for grins... It has been very well loved. As I remember, it was pink and purple, but I'm not sure the fabric has any color left. I earned a living doing embroidery for awhile, and was a volunteer assistant costumer for a children's performing company. (Are those separate, or do they count as one thing???)
Whew! This is harder than it looks.
5. The only country outside of North America I have ever visited is the United Kingdom.
6. My husband and I met at the restaurant where I worked when I was in college. HE says we met on a bar stool. I say it was a counter stool. {It was a pancake restaurant, and I was too young to go into bars!}
And now for #7... as if you didn't know... I have a wonderful husband, 3 awesome children, and undoubtedly the cutest little granddaughter anyone could ask for. How truly blessed I am!
So, all of you new winners, Congratulations! The award is well deserved. I have enjoyed each and every blog.
Now, here are your duties as award recipients {can you tell that I am a list person?}:
1. Thank the person who gave you the award (yes, that would be me)
2. Post about the award on your blog and link back to my blog from your blog - It would be great if you would follow my little blog too - I follow everyone (except the Wordpress blogs - do they have a follow feature? I subscribed to the RSS feed. Is that how you do it? Someone educate me, please.)
3. Bestow the award on 6 other bloggers and pass on the award. Stephanie said this part was like a "big blog hug". Consider yourselves hugged, bloggers!
4. Tell everyone 7 things about yourself in your blog post so everyone gets to know you better.
Well, I'm off to notify the winners! I can't wait to read everyone's blog postings.
And again, Congratulations!
Monday, April 11, 2011
"My Sewing Space" Mini QT 3D Quilt Creation
Don't forget to enter my Blogiversary Giveaway - Week 2 here.
I have been excited to tell you about the little quilt I made for the Mini QT swap. The theme was 3D, and there are several 3D elements to this little quilt.
Then there was a sketch. My (lack of) drawing ability is legend, so don't laugh. I drew and erased and drew and erased until I nearly wore a hole in the paper.
Then, I was surfing Flickr, and I found this photo and I knew I had my inspiration.
My partner said she liked pink, so I found a pink fat quarter with just a subtle print for the "wallpaper" and embroidered the dress form onto it. The "feet" of the dress form are beaded for a 3D effect, and the form itself is embroidered in perle cotton, which gave it a raised feel.
The dress form itself looked pretty stark until I added some trims. The girl at the cutting counter thought I was crazy when I only bought 1/8 yard of each LOL.
Then there was the sewing machine, which was a piece of Moda's Half Moon swirl that I embroidered gold swirls on with perle cotton. Of course, the machine is based on my mom's old Singer 99K sewing machine that I learned to sew on. I still have the machine, and what a workhorse it is. I swear this machine will sew concrete, if you ask it to. And with the original attachment, it still makes the best buttonholes you'll ever see. I added an embossed button where the "S" is on my singer.
The thread spool is from a piece of fabric I found which was all spools of thread. I fussy cut the spool, stuffed and quilted it, and then embroidered it with perle cotton, and ran the perle cotton through the machine as though it was threaded.
You've already seen the two little mini quilts, one from Dena Designs Kumari Gardens, left over from the butterfly place mats, and the Bliss by Bonnie and Camille, left over from the SUTK swap (more scrapbusting!!)
I wanted to give the impression of a wall hanging, so I bought some alphabet beads and stitched on "I {heart} to quilt". I wasn't perfectly happy with the colors, but it was all that was in the package.
And the vase of flowers - yes, the vase is 1/4 inch ribbon folded strategically.
And the teacup, which incidentally is a scrap from Abby's Easter Dress last year. Doesn't it LOOK like a China cup? (Say "yay" for Scrapbusting!)
And the clock. There is a French knot on the dial and the pulls are beads. The clock is a scrap from the Hideaway Potholders from PP6.
I think my favorite element of this quilt was the sewing table. The table fabric was a piece I found that looked like wood grain to me. The spools were done in the same way as the one for the sewing machine above. The scissors (they just HAD to be pink!) gave me fits. I think this is the 3rd or 4th try. The "bolt" is a French knot.
The tape measure was some cool fabric I found at my LQS, and I just filled in with buttons, to give the idea that perhaps they had spilled (or the seamstress is just sloppy?)
I think my favorite element of the whole quilt is the tomato pin cushion. I apologize for the shadows behind the pins, but that was one of the 3D elements, of course.
I wanted to show you the back of the quilt. PINK, of course.
And the label.
My partner makes dolls and lives in England, so I wanted there to be a Raggedy Anne doll on the quilt. I made several attempts at Raggedy dolls, and I just couldn't make them small enough to actually fit on the quilt without taking it over. My co-worker, who is British, told me they don't have Raggedy Anne in England, so I sent her along as well. In typical Raggedy Anne tradition, she has bloomers, a pinafore, and a heart embroidered on her chest.
Finally, I just had to send along one of my hexie needlebooks, in pink, to match the quilt's wallpaper.
I had a blast making this little 3D mini quilt (the whole thing measures 12 x 12 - the size of a sheet of scrapbook paper). It was fun to come up with new little details that would go with the 3D theme and enhance the finished quilt.
The frustrating thing was that you knew who your partner was, so you had to be careful what you shared and when. I've been dying to share my little creation, but she didn't receive it until last Friday. I hope she likes it. You can see her Flickr photo here.
Sunday, April 10, 2011
Super Mail Day!!
Be sure to drop in and enter my Blogiversary Giveaway (Week 2) here:
Yesterday morning, about 9:30, I was sitting in the den planning my projects for the day when the mailman pounded on the door. He had an Express Mail package for me. I really wasn't expecting anything, especially not Express Mail.
When I opened the package, there were these two delightful GMFG blocks from Laine. It seems that she had mailed the package on time, and to my address, but in Atlanta. Oops. I really had only vaguely thought about the fact that I was missing some blocks, and I certainly didn't expect her to spend a fortune to mail them, but aren't they beautiful? And they will add so much to my quilt. I showed it yesterday, but I'm pretty excited about it, so I'll do it again. Here are all the GMFG blocks I have so far...
And here are all the hexies I have already made that just have to be sewn into blocks...
I'm really starting to get excited about my quilt.
In the afternoon, WH and I took an unplanned lunchbreak (with a coupon, of course - thank you Wanita) and then went to the Navy Exchange. When I got home, there was another package on my doorstep. A big one. It was so cute. I tore into it before I took a picture, but it had cute stickers on the address label, and I just knew it had to contain something wonderful.
This is what was in it...
Can you believe it? All this, for ME?? I was blown away. My partner, Suzettra, had apparently stalked me forever, and she came up with the perfect things. I told her I didn't think there were enough exclamation points in the universe to describe how excited I was!!!!!
There was a yummy orange, peach and aqua sewing machine cover. I have been coveting one of these, even to the point of joining another swap that is devoted solely to making sewing machine covers for each other. (Don't despair, other partner (whoever you are), I have three sewing machines, a serger, and a blind hemmer, so whatever you make me will be put to good use!)
Here is a close up of the center of the block. I apologize for the wrinkle, Suzettra. I pressed it, but it doesn't want to come out. I'm sure it will in a day or two. Isn't the center motif cute?!
And here's my new cover in its new habitat, ON my machine. It fits perfectly!
Then, there was this awesome hoop with a quote from (Jane Austen?) I'll have to find out. Won't it look wonderful on the almost bare wall in the sewing room. Too cool!
There was also this cute needlebook and pin cushion. Check out the cute, cute, cute fabrics. I LOVE the sewing machine. And the owls... And the bicycles... And the little house... Oh, such yumminess.
Oh, and did I mention that each one of these little goodies was wrapped individually in tissue paper and tied with selvage ribbon? How clever is THAT? And the tape she used had scissors on it. Is that perfect, or what?
Oh, and ostensibly, the point of the whole exercise is to share fabric, so look at the fabric she sent. All but one piece is Amy Butler. Don't I just love AB? Of course I do.
And as if that wasn't enough, there was a little notebook with the coolest sequined pen, some reference cards, and the most delightful little note. Turns out she and BD#1 have swapped fabric recently. I just know that if we lived anywhere close we would have to be good friends. She hit the nail so totally on the head!
Thank you, Suzettra! I feel like I just won the lottery.
Saturday, April 9, 2011
Scrapbuster Saturday - Scrappy Bee Blocks and Jelly Roll Scrapbuster Market Bag Tutorial
Be sure you drop by and enter my Blogiversary Giveaway (week 2) here:
Today's post is all about scrapbusting. My scraps are running me out. Some are a decent size, but most are just puny little bits I just don't have the heart to throw away. At the price of fabric, I just can't give up on them without a fight.
So what do you do with all those little scraps? I have devoted today to ways to use these little gems and turn them into something useful.
One of the things I've been doing is satisfying my new hexie craving. Hexies are a great project to keep your hands busy when you're sitting watching TV or a movie. I do this a lot when I don't want to sit at the sewing machine, for whatever reason. Aren't they pretty? Before I tried it, I thought making hexies would be a real drag, but frankly, they're downright addictive. And they make beautiful flower blocks. Check this out...
Since March was my month as Queen Bee, these are the blocks that the ladies in the First Time Bee made for me, except for the three on the bottom, which are the ones I made. Aren't they beautiful? Won't this make a lovely quilt? I'm tempted to simply applique them on white squares and call it a quilt. I think it would be lovely.
The other creative scrapbusting thing I did today was make bee blocks for Kari, who is the April QB. She requested mod trees for her blocks. We were to make two blocks, but I was on a roll and couldn't stop. What do you think of these?
My first idea was a tree with hexie "leaves" but someone beat me to it, so I decided to try Dresden leaves. I used some of the Kumari Gardens scraps left from the butterfly placemat set I gave to my sister for her birthday.
My next idea was a "Sparse Leaves Tree" roughly based on the Lanterns Bloom tree quilt I made last summer for BD#2, but on a much smaller scale, of course. I thought about stuffing the leaves like I did on the quilt, but the leaves are just too small for that, and larger leaves would have looked weird. As it was, I had to cut them down for them to look right. This project used some of the wasted triangles (I saw someone call them "bonus triangles" - I think I like that) from the Central Park Whirly Wheels quilt.
This started out to be a ticker tape tree using more of the bonus triangles from the Whirly Wheels quilt, similar to the one here. But once I got this far, I just couldn't "scribble" on it. I realized later that the ticker tape was supposed to be background, but honestly, I liked it as it is. I hope Kari does, too.
The "trunk" of all three trees is left over from the Lanterns Bloom quilt, so these projects were entirely made of scraps,except for the background squares.
And before I get started with the tutorial I promised, I have a question... How do you store your scraps? I'd love to know. First I had mine in a zip lock bag, but they outgrew the bag. Then I had them in a basket, but they outgrew the basket. Then I put them in some glass vases (they ARE very pretty, you know) and those are full to the brim. Just what do you do with all those very pretty, but space-consuming scraps?
Scrapbuster Jelly Roll Market Tote Tutorial
I had a lot of random pieces of the Central Park jelly roll left after I finished the Whirly Wheels quilt, and I had been agonizing over what to do with them until I got the idea for the Scrapbuster Jelly Roll Market Tote. As promised, here is the tutorial for the tote.
This project can be adjusted based on the scraps you have on hand. Basically, we are going to start out by creating a "piece" of fabric 30 inches wide by 17 inches long. How you do this is up to you. I will tell you what I did and you can adjust accordingly.
You will need:
Jelly roll strips or yardage to make a piece of fabric 30 inches wide by 17 inches tall
A piece of lining fabric 30 inches wide by 17 inches tall or enough pieces to piece together that size
4 additional jelly roll strips 15 inches long
A jelly roll scrap about 10 inches long
A jelly roll strip or yardage strip 32 inches long for binding
A small scrap of velcro
A ruler and/or seam gauge
A pencil or fade-away marker
All seams are 1/4 inch unless otherwise stated.
Since the width of our fabric base is 30 inches, and jelly roll strips are 2 inches wide after seaming, we need 15 jelly roll strips for the top of our bag. I stacked up about 8 at a time (because that's all my rotary cutter can handle) and cut them 5-1/2 inches long.
NOTE: I used shorter strips in the next bag, so this is not set in stone. Use what you have!
Assembly line sew the jelly roll strips together in a pleasing configuration, first in pairs... then sew the pairs together to make 4... then sew the fours together and sew on, until they are all joined in one continuous 30-1/2 inch strip, like so:
Iron the seams all one direction from the WRONG side...
Then turn it over and press from the RIGHT side, making sure the seams are fully open and there are no "pleats" in your pieced fabric.
I had a strip of border left from the quilt that was 2 inches wide. If you don't, that's OK. Just use another jelly roll strip and factor in the extra 1/2 inch to your calculation. This makes 6-1/2 inches toward our 17 inch piece. Sew the strip to the first section you pieced. I find it is easiest to put the pieced section on top with the seam openings toward me so that the seams don't get twisted as they go under the presser foot.
Trim the 2-inch piece to the correct length when the two sections are stitched together.
Press the seam as before, first from the wrong side, then from the right side, making sure that the seam is crisp and flat.
I had a large piece of yardage left over from the quilt. Since the top of my bag now measures 6-1/2 inches, and I need it to be 17 inches, I need 10-1/2 inches plus 1/2 inch seam allowance is 11 inches for the bottom of my bag. I cut a piece 30 inches wide by 11 inches.
If you don't have a large piece of fabric, piece your jelly roll strips together horizontally, instead of vertically. This will give your bag some visual interest.
Sew your bag bottom to the pieced top with a 1/4 inch seam.
Press the seam toward the top from the wrong side, then
turn it over and press from the top.
Matching the top edge, bottom edge, and the two horizontal seams, sew the side seam together with a 1/4- inch seam. Sew the seam again between the seam you just sewed and the edge of the fabric. This will give your tote extra strength to carry heavy stuff.
Fold the bag in half with the side seam at one end. Make sure your bag is flat and that your edges at top and bottom meet. Sew a 3/8 inch seam across the bottom of your bag. Sew another seam at 1/4 inch for strength.
Mark the sides of the bag with a pin near the bottom seam; one right at the seamline on the seamed side, and one right on the fold line on the unseamed side. Fold the bag crossways matching the side seam and the bottom seam and secure with a pin. Be sure to poke out the corner of the bag where the two seams meet and make sure there are no puckers or pleats underneath.
Lay your bag on a flat surface, and with a ruler or tape, measure 1-3/4 inches from the corner (where the side seam and bottom seam meet-not including the seam allowance). Take a ruler (you will need the straight edge) and place it perpendicular to the seam gauge. Place the "0" on one edge of the fabric. Your line will be straight when the ruler measures exactly 3-1/2 inches on the other side.
Remove the seam gauge and draw a straight line from side to side. There are all kinds of fancy marking tools on the market, but since this seam is on the inside and will never show, I just use a pencil.
Stitch along the pencil line.
Repeat for other corner, using the side fold in place of the side seam as your guide.
Cut a piece 30 inches by 17 inches for your lining. The piece of fabric I had was 2 inches short, so I just added a piece of fabric to the top edge to make it work.
Construct the lining of your bag in the same manner as the outside, sewing the side and bottom seams and marking and then marking and sewing the lining corners.
With the bag right side out and the lining wrong side out, place the bag lining inside the bag, matching the side seams and the bottom corners.
Pin the bag and the lining together at the top at the side seam and the side fold.
Fold the bag again so the two pins touch each other, and mark both edges with a pin.
This pin marks the center of the bag on each side.
With another pin, mark a spot 3 inches on each side of the center pin on each side. Be sure to pin through both the bag and the lining and that the top of the bag and the lining meet. You want to make sure your bag fits together nicely at this point, because we're getting ready to finish it up.
From your jelly roll strips, cut 4 pieces 15 inches long. I like to have 2 sets of 2, but if you want to change it up a bit, that could be fun.
Sew 2 strips together down both sides of your 15 inch strips. Repeat for the other pair of strips.
Using your method of choice, turn the handle sets right side out. I use a safety pin. Put the pin through only one layer of the handle fabric...
Gather the fabric along the pin through the middle until the pin comes out the other side, and...
Pull it right side out.
Press each handle along the seam so it is nice and flat. Sometimes I find that I have to roll the seam back and forth in my fingers to pull the seam all the way out. Occasionally, I find that I have to use a pin or the point of a seam ripper placed ever so carefully right at the seam line to pull the seam completely flat. Press thoroughly for a nice, crisp seam.
Top stitch the handles down both sides of each handle 1/4 inch from the edge.
Place the handles on the OUTSIDE of the bag, lining up the edge of the handle with the pin you placed 3 inches from the center. Since I want the orange to be the outside of the handle, I have the blue facing up.
Sew the handles on the bag using a 1/4 inch seam. I like to triple stitch over each of the handles so that they are good and sturdy for carrying my groceries. To do this, I sew across the handle, press the reverse button, and sew it again, then release the reverse button and sew forwards across it again.
Fold the 10 inch jelly roll strip in half and press.
Now, fold each cut edge toward the center and press. Be careful not to burn your fingers!
Press it flat along the fold.
Stitch along both sides of the strip.
Cut a piece of velcro about 1 to 1-1/2 inches long and sew the loop side to the strip about 1-1/2 inches from the top by sewing around all 4 sides.
Make sure your jelly roll strip measures 10 inches. Mine didn't, so I cut it off at 10 inches.
Fold the end of the strip under about 1/2 inch and stitch the hook side of the velcro to the opposite side of the strip.
It should look like this.
Place the strip with the velcro end right side up at the top of the bag on the lining side of the bag directly beneath the center of one of the handles. Triple stitch it to the bag 1/4 inch away from the top.
Leaving a tail about 2 inches long, take your binding strip and place it WRONG side down on top of the LINING side of the bag. (NOTE: I had a piece of binding left over from my quilt, so my strip was only 2 inches wide. You may wish to cut your jelly roll strip to 2 inches to make this part easier.)
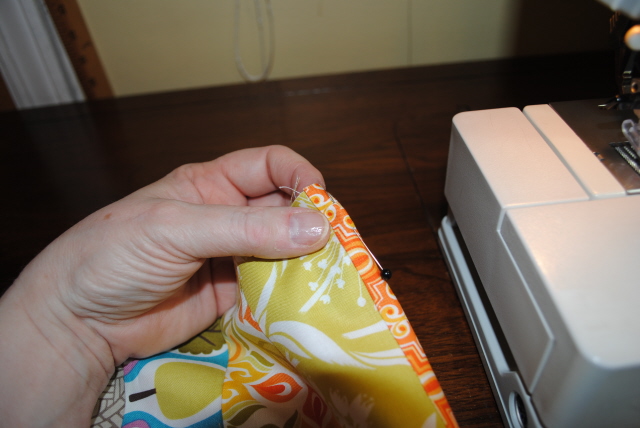
Start about 1 inch beyond the seam (be sure you backstitch here so your seam doesn't pull out later) and sew all the way around the bag until you get about 1 inch from the seam. Stop. Secure your seam with backstitches.
Remove your fabric from the machine and lay the bag on a flat surface. Match the tail of the beginning of the strip with the tail of the end of the strip and pin together.
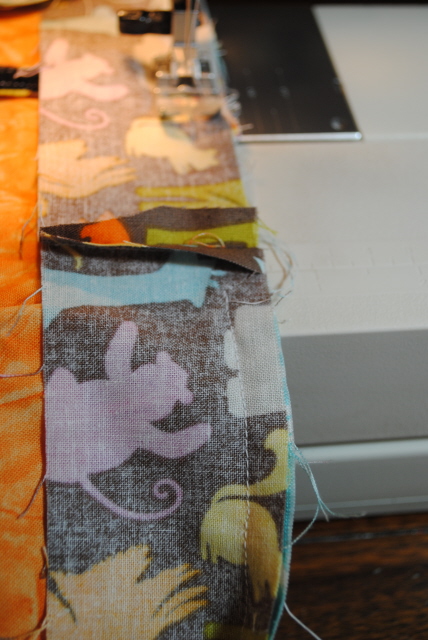
Cut the tails to 1/4 inch and sew the tails together. Make sure you do not catch any of the bag fabric in this seam.
Take your bag back to the machine and sew across this small space, sewing the seam open. If you wish, take your bag to the ironing board and press this seam so that the seam allowance and the binding go UP, away from the bottom of the bag. (I do not press here, but some people might find it easier to press it now.)
Fold your binding so the raw edge of the binding snugs up to the raw edge of the bag. This should approximately fold the binding strip in half. Again, you may wish to press this fold in the binding in place, but I do not.
Fold over again to enclose the raw edge and stitch close to the edge all the way around making sure the binding covers the previous stitching and backstitching before cutting your threads.
Voila! Your bag is complete. Cute huh? And the variations are endless. I made another one that looked like this...
I didn't have a big enough piece for the bottom, so I pieced it to make it 17 inches long. Since I already had a break in the fabric, I decided I didn't want the blue strip in it, so I added just a folded piece of fabric instead, kind of like piping, but without the cord.
Want it wider or deeper, just vary your measurements accordingly.
Keep your little bag rolled up in your car or purse and then pull it out when you get to the store. Great for the environment and lots more fun for you to have a cute little bag rather than some plastic monstrosity. Make a bunch and use them for all your shopping. Make a bunch more and give them away. Your friends will appreciate a cute little bag too, I'm sure!
This project is fast and easy. It took longer to make these two for the tutorial, of course, since I was taking pictures and I had to stop more to think about what I was doing, but I made the first bag in less than an hour. I'm finding I have a new appreciation for projects like this that I can finish in an evening after work.
Also, if you have any questions or something doesn't make sense, please let me know. I was on a roll with this tutorial when the computer crashed, leaving several steps and photos unsaved. I think I re-did them all, but let me know if I missed one.
I hope you enjoy making and using this Scrapbuster Jelly Roll Market Bag!
Subscribe to:
Posts (Atom)