Be sure you drop by and enter my Blogiversary Giveaway (week 2) here:
Today's post is all about scrapbusting. My scraps are running me out. Some are a decent size, but most are just puny little bits I just don't have the heart to throw away. At the price of fabric, I just can't give up on them without a fight.
So what do you do with all those little scraps? I have devoted today to ways to use these little gems and turn them into something useful.
One of the things I've been doing is satisfying my new hexie craving. Hexies are a great project to keep your hands busy when you're sitting watching TV or a movie. I do this a lot when I don't want to sit at the sewing machine, for whatever reason. Aren't they pretty? Before I tried it, I thought making hexies would be a real drag, but frankly, they're downright addictive. And they make beautiful flower blocks. Check this out...
Since March was my month as Queen Bee, these are the blocks that the ladies in the First Time Bee made for me, except for the three on the bottom, which are the ones I made. Aren't they beautiful? Won't this make a lovely quilt? I'm tempted to simply applique them on white squares and call it a quilt. I think it would be lovely.
The other creative scrapbusting thing I did today was make bee blocks for Kari, who is the April QB. She requested mod trees for her blocks. We were to make two blocks, but I was on a roll and couldn't stop. What do you think of these?
My first idea was a tree with hexie "leaves" but someone beat me to it, so I decided to try Dresden leaves. I used some of the Kumari Gardens scraps left from the butterfly placemat set I gave to my sister for her birthday.
My next idea was a "Sparse Leaves Tree" roughly based on the Lanterns Bloom tree quilt I made last summer for BD#2, but on a much smaller scale, of course. I thought about stuffing the leaves like I did on the quilt, but the leaves are just too small for that, and larger leaves would have looked weird. As it was, I had to cut them down for them to look right. This project used some of the wasted triangles (I saw someone call them "bonus triangles" - I think I like that) from the Central Park Whirly Wheels quilt.
This started out to be a ticker tape tree using more of the bonus triangles from the Whirly Wheels quilt, similar to the one
here. But once I got this far, I just couldn't "scribble" on it. I realized later that the ticker tape was supposed to be background, but honestly, I liked it as it is. I hope Kari does, too.
The "trunk" of all three trees is left over from the Lanterns Bloom quilt, so these projects were entirely made of scraps,except for the background squares.
And before I get started with the tutorial I promised, I have a question... How do you store your scraps? I'd love to know. First I had mine in a zip lock bag, but they outgrew the bag. Then I had them in a basket, but they outgrew the basket. Then I put them in some glass vases (they ARE very pretty, you know) and those are full to the brim. Just what do you do with all those very pretty, but space-consuming scraps?
Scrapbuster Jelly Roll Market Tote Tutorial
I had a lot of random pieces of the Central Park jelly roll left after I finished the Whirly Wheels quilt, and I had been agonizing over what to do with them until I got the idea for the Scrapbuster Jelly Roll Market Tote. As promised, here is the tutorial for the tote.
This project can be adjusted based on the scraps you have on hand. Basically, we are going to start out by creating a "piece" of fabric 30 inches wide by 17 inches long. How you do this is up to you. I will tell you what I did and you can adjust accordingly.
You will need:
Jelly roll strips or yardage to make a piece of fabric 30 inches wide by 17 inches tall
A piece of lining fabric 30 inches wide by 17 inches tall or enough pieces to piece together that size
4 additional jelly roll strips 15 inches long
A jelly roll scrap about 10 inches long
A jelly roll strip or yardage strip 32 inches long for binding
A small scrap of velcro
A ruler and/or seam gauge
A pencil or fade-away marker
All seams are 1/4 inch unless otherwise stated.
Since the width of our fabric base is 30 inches, and jelly roll strips are 2 inches wide after seaming, we need 15 jelly roll strips for the top of our bag. I stacked up about 8 at a time (because that's all my rotary cutter can handle) and cut them 5-1/2 inches long.
NOTE: I used shorter strips in the next bag, so this is not set in stone. Use what you have!
Assembly line sew the jelly roll strips together in a pleasing configuration, first in pairs... then sew the pairs together to make 4... then sew the fours together and sew on, until they are all joined in one continuous 30-1/2 inch strip, like so:
Iron the seams all one direction from the WRONG side...
Then turn it over and press from the RIGHT side, making sure the seams are fully open and there are no "pleats" in your pieced fabric.
I had a strip of border left from the quilt that was 2 inches wide. If you don't, that's OK. Just use another jelly roll strip and factor in the extra 1/2 inch to your calculation. This makes 6-1/2 inches toward our 17 inch piece. Sew the strip to the first section you pieced. I find it is easiest to put the pieced section on top with the seam openings toward me so that the seams don't get twisted as they go under the presser foot.
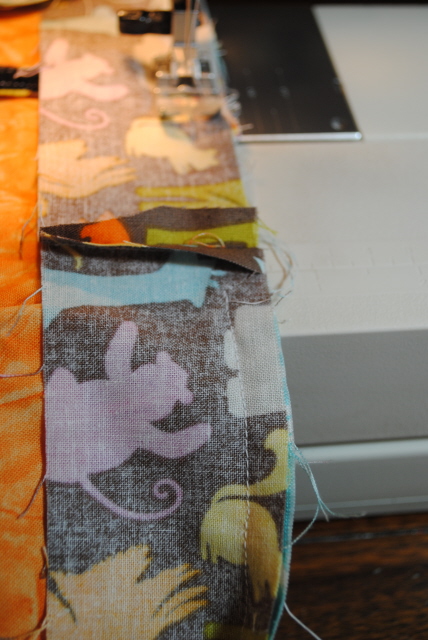
Trim the 2-inch piece to the correct length when the two sections are stitched together.
Press the seam as before, first from the wrong side, then from the right side, making sure that the seam is crisp and flat.
I had a large piece of yardage left over from the quilt. Since the top of my bag now measures 6-1/2 inches, and I need it to be 17 inches, I need 10-1/2 inches plus 1/2 inch seam allowance is 11 inches for the bottom of my bag. I cut a piece 30 inches wide by 11 inches.
If you don't have a large piece of fabric, piece your jelly roll strips together horizontally, instead of vertically. This will give your bag some visual interest.
Sew your bag bottom to the pieced top with a 1/4 inch seam.
Press the seam toward the top from the wrong side, then
turn it over and press from the top.
Matching the top edge, bottom edge, and the two horizontal seams, sew the side seam together with a 1/4- inch seam. Sew the seam again between the seam you just sewed and the edge of the fabric. This will give your tote extra strength to carry heavy stuff.
Fold the bag in half with the side seam at one end. Make sure your bag is flat and that your edges at top and bottom meet. Sew a 3/8 inch seam across the bottom of your bag. Sew another seam at 1/4 inch for strength.
Mark the sides of the bag with a pin near the bottom seam; one right at the seamline on the seamed side, and one right on the fold line on the unseamed side. Fold the bag crossways matching the side seam and the bottom seam and secure with a pin. Be sure to poke out the corner of the bag where the two seams meet and make sure there are no puckers or pleats underneath.
Lay your bag on a flat surface, and with a ruler or tape, measure 1-3/4 inches from the corner (where the side seam and bottom seam meet-not including the seam allowance). Take a ruler (you will need the straight edge) and place it perpendicular to the seam gauge. Place the "0" on one edge of the fabric. Your line will be straight when the ruler measures exactly 3-1/2 inches on the other side.
Remove the seam gauge and draw a straight line from side to side. There are all kinds of fancy marking tools on the market, but since this seam is on the inside and will never show, I just use a pencil.
Stitch along the pencil line.
Repeat for other corner, using the side fold in place of the side seam as your guide.
Cut a piece 30 inches by 17 inches for your lining. The piece of fabric I had was 2 inches short, so I just added a piece of fabric to the top edge to make it work.
Construct the lining of your bag in the same manner as the outside, sewing the side and bottom seams and marking and then marking and sewing the lining corners.
With the bag right side out and the lining wrong side out, place the bag lining inside the bag, matching the side seams and the bottom corners.
Pin the bag and the lining together at the top at the side seam and the side fold.
Fold the bag again so the two pins touch each other, and mark both edges with a pin.
This pin marks the center of the bag on each side.
With another pin, mark a spot 3 inches on each side of the center pin on each side. Be sure to pin through both the bag and the lining and that the top of the bag and the lining meet. You want to make sure your bag fits together nicely at this point, because we're getting ready to finish it up.
From your jelly roll strips, cut 4 pieces 15 inches long. I like to have 2 sets of 2, but if you want to change it up a bit, that could be fun.
Sew 2 strips together down both sides of your 15 inch strips. Repeat for the other pair of strips.
Using your method of choice, turn the handle sets right side out. I use a safety pin. Put the pin through only one layer of the handle fabric...
Gather the fabric along the pin through the middle until the pin comes out the other side, and...
Pull it right side out.
Press each handle along the seam so it is nice and flat. Sometimes I find that I have to roll the seam back and forth in my fingers to pull the seam all the way out. Occasionally, I find that I have to use a pin or the point of a seam ripper placed ever so carefully right at the seam line to pull the seam completely flat. Press thoroughly for a nice, crisp seam.
Top stitch the handles down both sides of each handle 1/4 inch from the edge.
Place the handles on the OUTSIDE of the bag, lining up the edge of the handle with the pin you placed 3 inches from the center. Since I want the orange to be the outside of the handle, I have the blue facing up.
Sew the handles on the bag using a 1/4 inch seam. I like to triple stitch over each of the handles so that they are good and sturdy for carrying my groceries. To do this, I sew across the handle, press the reverse button, and sew it again, then release the reverse button and sew forwards across it again.
Fold the 10 inch jelly roll strip in half and press.
Now, fold each cut edge toward the center and press. Be careful not to burn your fingers!
Press it flat along the fold.
Stitch along both sides of the strip.
Cut a piece of velcro about 1 to 1-1/2 inches long and sew the loop side to the strip about 1-1/2 inches from the top by sewing around all 4 sides.
Make sure your jelly roll strip measures 10 inches. Mine didn't, so I cut it off at 10 inches.
Fold the end of the strip under about 1/2 inch and stitch the hook side of the velcro to the opposite side of the strip.
It should look like this.
Place the strip with the velcro end right side up at the top of the bag on the lining side of the bag directly beneath the center of one of the handles. Triple stitch it to the bag 1/4 inch away from the top.
Leaving a tail about 2 inches long, take your binding strip and place it WRONG side down on top of the LINING side of the bag. (NOTE: I had a piece of binding left over from my quilt, so my strip was only 2 inches wide. You may wish to cut your jelly roll strip to 2 inches to make this part easier.)
Start about 1 inch beyond the seam (be sure you backstitch here so your seam doesn't pull out later) and sew all the way around the bag until you get about 1 inch from the seam. Stop. Secure your seam with backstitches.
Remove your fabric from the machine and lay the bag on a flat surface. Match the tail of the beginning of the strip with the tail of the end of the strip and pin together.
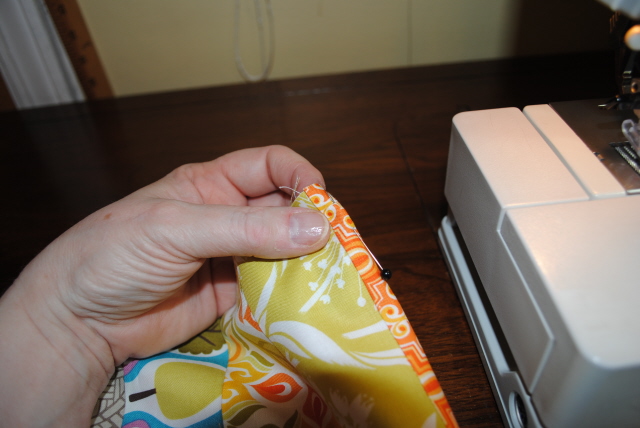
Cut the tails to 1/4 inch and sew the tails together. Make sure you do not catch any of the bag fabric in this seam.
Take your bag back to the machine and sew across this small space, sewing the seam open. If you wish, take your bag to the ironing board and press this seam so that the seam allowance and the binding go UP, away from the bottom of the bag. (I do not press here, but some people might find it easier to press it now.)
Fold your binding so the raw edge of the binding snugs up to the raw edge of the bag. This should approximately fold the binding strip in half. Again, you may wish to press this fold in the binding in place, but I do not.
Fold over again to enclose the raw edge and stitch close to the edge all the way around making sure the binding covers the previous stitching and backstitching before cutting your threads.
Voila! Your bag is complete. Cute huh? And the variations are endless. I made another one that looked like this...
I didn't have a big enough piece for the bottom, so I pieced it to make it 17 inches long. Since I already had a break in the fabric, I decided I didn't want the blue strip in it, so I added just a folded piece of fabric instead, kind of like piping, but without the cord.
Want it wider or deeper, just vary your measurements accordingly.
Keep your little bag rolled up in your car or purse and then pull it out when you get to the store. Great for the environment and lots more fun for you to have a cute little bag rather than some plastic monstrosity. Make a bunch and use them for all your shopping. Make a bunch more and give them away. Your friends will appreciate a cute little bag too, I'm sure!
This project is fast and easy. It took longer to make these two for the tutorial, of course, since I was taking pictures and I had to stop more to think about what I was doing, but I made the first bag in less than an hour. I'm finding I have a new appreciation for projects like this that I can finish in an evening after work.
Also, if you have any questions or something doesn't make sense, please let me know. I was on a roll with this tutorial when the computer crashed, leaving several steps and photos unsaved. I think I re-did them all, but let me know if I missed one.
I hope you enjoy making and using this Scrapbuster Jelly Roll Market Bag!