Showing posts with label A Crafty Fox. Show all posts
Sunday, August 1, 2021
Summer Break Projects - Part 2 - A Limerick Quilt
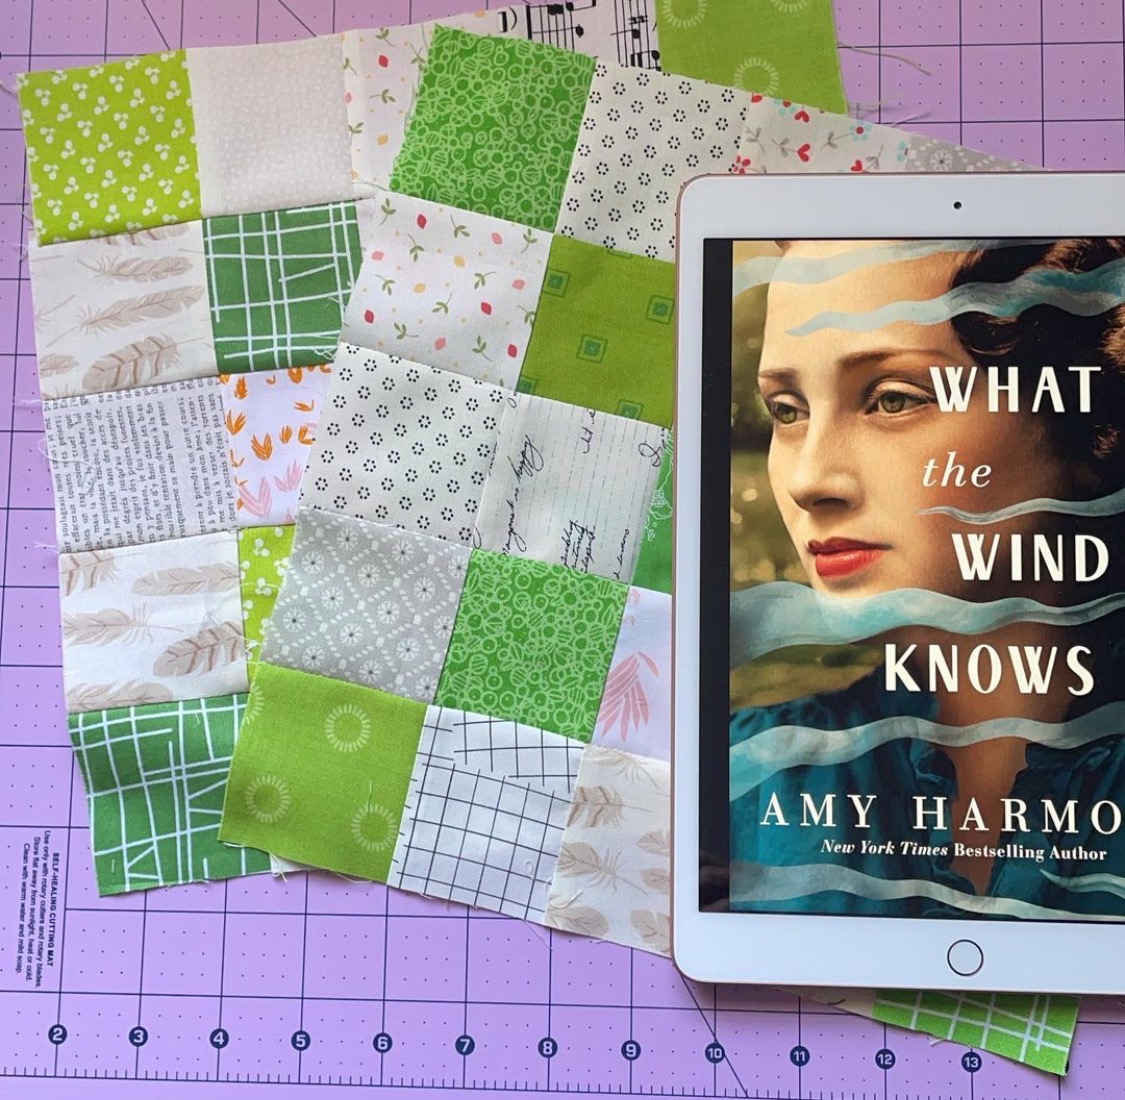
In early March, my daughter put together a Quilt-and-Read Along on Instagram. I had plenty of greens and lots of low volumes, and when Spring Break began, I was anxious for a project that did not include Google Meet, or screens of any kind. I started cutting. By the end of Spring Break, I had all the blocks made - or thought I did. And best of all, since I had the fabrics stashed already, this quilt (in my mind, at least) was "free".
Right before the end of the school year, I managed to get most of the blocks put together. This pattern looks so complicated, but when you follow Amanda's Limerick Pattern it's super easy. She gives great tips and directions for making this process go fast.
Once I finished the scrappy quilt, I decided the next job was to finish the Limerick quilt. The top was together after all, and it only needed borders. Unfortunately, whereas I thought I had all the blocks made, I had been wondering why I has so many low volume rows left over. The answer was that I hadn't made ANY of the low volume border blocks, and hadn't put the outside row of low volumes on the green blocks. Oops. And even worse, I had allowed the grands to create with the LV strip sets, and had even taken some apart for my scrap quilt, totally ignoring that voice in my head that said, "Are you sure???"
It turned out OK, of course. I have bins and bins of scraps, and an entire 1 cubic foot bin of low volume scraps. Scraps were thereby obtained, cut up, sewn together, and placed in the correct positions on the quilt, and a (very large) quilt was born. It is currently sandwiched and awaiting its turn to be quilted.
I love these greens. They are so fresh and clean. And the low volumes add so much dimension. If you want a tutorial on how to choose low volumes for your next project, check out @a.crafty.fox on Instagram. It's in her stories.
Friday, July 31, 2020
Sunny Side Up Quilt
In the middle of this Covid mess, my daughter made this quilt - mostly to cheer herself up, I think. The response on Instagram was so positive that she created a kit so others could make it too. (BTW: This is the Sunny Side Up quilt by A Crafty Fox for Westwood Acres Fabrics, and you can see her version on her blog.)
Thankfully, I was lucky enough to be able to get a kit. This was the perfect quilt to make in an incredibly hot, rainy July with all that is going on in our world.
Amanda had a cute photo on her IG feed and I tried to imitate it, but wasn't terribly successful. So this is my attempt to be artsy. BTW, Amanda has some great cutting suggestions on the pattern that make cutting super easy, and soooo fast!
First, lots of sewing and trimming Half Square Triangles. The task is kind of tedious, but tedium is not always a bad thing. If your hands are busy, your mind can seldom focus for long on disagreeable things.
One of the things my girly does very well is choose low volume fabrics. I would never have been bold enough to use all of these fabrics together without them being in the kit, but don't they play nice together in the finished product. I will be more daring in my fabric choices the next time I make a quilt with LV background, for sure.
Also the way she puts her 9-patch blocks together is so easy. She cuts her fabrics into strips, sews the strips together, and each strip becomes a row. SO much easier (and faster!) than cutting bits of fabric and sewing them together individually.
I was really excited about my first Bear Paw block. Too excited apparently, since I put it together wrong. It wasn't until I posted it on Instagram and had several people tell me it wasn't right (thank you friends!) that I realized it.
So a bit of ripping and resewing and I was on my way. I was actually very glad I posted the picture - that way I didn't have to remake all the blocks! You can bet I was extremely careful to check the fabric placement before I sewed the rest.
As you can see, I couldn't wait to get my first row finished. I'm always kind of flabbergasted that quilts created "on point" go together so strangely. Amanda has a clever method for making the trimming easy as you create the rows that is just fabulous. see those bigger blocks hanging off the rows? Those make trimming the quilt evenly a snap.
Progress being made. Blocks going together. Obviously my board isn't wide enough.
Getting there. At this point, the quilt is half finished.
And now, all it needs is trimming, which I did just a few days ago. If it ever stops raining, I'll get my "quilt husband" to venture outside with me to photograph some quilts.
Thursday, June 12, 2014
Treasure Map
I had every intention of blogging a bit after the ECMQG meeting on Saturday. In my last post I mentioned how I hoped to get a whole bunch of quilts sandwiched. I spent Friday making backs for 5 quilts, and managed to get four of them sandwiched. But then on Sunday afternoon, my daughter sent me a pattern to test, and it was so gorgeous, I just couldn't wait!
I made the first block right away. Since this was a Treasure Map, and since when you look for treasure you look for gems and jewels, and since Anna Maria Horner's fabrics are all in such luscious jewel tones, I decided to dig into my jealously guarded stash of AMH loveliness to create these blocks. I really think the blocks are stunning. In fact, we had just finished our AMH fat eighth swap at the ECMQG meeting on Saturday, so it was just serendipity that this pattern uses entirely fat eighths, except for the background.
I really only intended to make one block, but once I got started, I couldn't stop.
The next thing I knew, I had four blocks finished.
And I have to say, the trimmings were sure pretty.
And the more blocks I made the more excited I got.
And I just kept making blocks. And pretty soon, I was turning them out pretty fast...
And by yesterday afternoon, I had a finished quilt top.
I am really jazzed by this quilt. The only problem is, it adds another unfinished quilt top to the growing stack of unfinished quilt tops! Ahhh, well...
Oh, by the way, you can purchase the pattern here.
Monday, May 19, 2014
Five Easy Pieces - Part II
Well, I never did get around to posting on the blog this weekend, did I? I didn't get around to putting away those last few little things in my room so I could take pictures, either. Guess this weekend wasn't very productive. With that in mind, I'll share the second quilt top in my Five Easy Pieces series. This is another of the quilts in my 14 in 2014 goal, and it is also one that I took to Stash Bash. It came home with four of the five rows completed, but not finished. I had bought some Free Spirit Aqua solid for the sashing, but I only bought 1/2 yard.... If it had been 5/8 yard, I would have had this finished. It took less than an hour to complete the sashing once I got home.
While I was in Utah last Thanksgiving, my daughter asked me if I would be the pattern tester for her new quilt design. Never one to turn down the opportunity to cut fabric into tiny pieces and sew it back together in lovely designs, naturally I obliged. But we had a little miscommunication, and the fabric I used for the background wasn't what she intended and I ended up re-making the blocks and bringing the original blocks home with me to make my own quilt. This one actually hasn't been sitting in the WIP basket very long.
The pattern is Shiny Brite, designed by my very talented daughter. I love how the stars in the sashing echo the stars in the block centers. It makes a lovely Christmas quilt, sort of reminiscent of Christmas baubles hanging on the tree, isn't it? The fabric is Just for Fun by Creative Thursday for Andover Fabrics. As mentioned above, I used Free Spirit Aqua for the sashing (since I didn't have any more of the background fabric) and some red dots I had laying around for the star cornerstones. Even though Amanda used matching sashing in the original and I loved it, I really like the contrast. The aqua is subtle, but adds a bit of pizzaz I think.
I'm really happy with this quilt top. Can't wait to get it quilted!
![]() |
| Photo courtesy of WestWood Acres |
The pattern is Shiny Brite, designed by my very talented daughter. I love how the stars in the sashing echo the stars in the block centers. It makes a lovely Christmas quilt, sort of reminiscent of Christmas baubles hanging on the tree, isn't it? The fabric is Just for Fun by Creative Thursday for Andover Fabrics. As mentioned above, I used Free Spirit Aqua for the sashing (since I didn't have any more of the background fabric) and some red dots I had laying around for the star cornerstones. Even though Amanda used matching sashing in the original and I loved it, I really like the contrast. The aqua is subtle, but adds a bit of pizzaz I think.
I'm really happy with this quilt top. Can't wait to get it quilted!
Monday, January 27, 2014
14 in 2014 - First Finish
I know my poor little blog is feeling very neglected, but I've been quilting up a storm.
Remember this?
It took way longer than I thought it would, but it is now done. D. O. N. E.!
Lots of quilting late into the night. LOTS of bobbin changes!
Some quilting stitches I've never tried before - chrysanthemums and whatever you might want to call those swirly things...
And some that I'm pretty comfortable with, like leaves and herringbones...
And while I haven't been able to get a good picture yet - can you believe they've closed schools for the next 2 days because they expect snow! In Florida!! - I'm pretty pleased with this one.
The pattern was designed by my very own daughter. You can find it here. The fabric is Beechwood Park, by Jeanean Morrison, and it is backed by one of the prints in the line. It finished at about 59" x 70".
Ta-Da!!
My first finish for 2014. One down, 13 to go.
Sunday, January 19, 2014
Back in the Saddle - um... Sewing Room
I've been back in the sewing room this week, and it feels pretty good. I feel like I'm ready to tackle a few of the projects in there waiting for my attention, so maybe I just needed a bit of a break.
My friend Leona asked me to quilt this little mini pinwheel quilt for her, and it was a fun little project. I outline quilted all the little twisters to emphasize the pinwheels, then carried that through to the first border.
I really love the texture the outline quilting gave this little quilt. It feels great as I run my hand over it.
I herringbone quilted the outer border. I really like the rhythm of quilting herringbones, even if they are far from perfect. And I really haven't figured out corners yet. They're getting better, though.
I'm still doing a couple of swaps - the ongoing kind, that I've been doing for a long time. I made this little turtle for my partner in the Sewing With Friends swap. The theme this time was pin cushions. I meant to make this little guy last summer, but I had misplaced the pattern. Finally found it and created this fun little critter. The pattern is Henrietta by Heather Bailey. So cute. And fun to make.
Another swap I started just this year is the Handmade Birthday Swap. I'm in the sewitsyourbirthday group. Since my birthday is in January, I've been receiving fun little gifts for awhile, and when I have them all, I will do a big reveal. In the meantime, this little quilted tool caddy is what I gave to the other birthday girl this month.
I filled it with a few fun little goodies too.
Always before I have pin basted my quilts, but when my sister asked me to quilt the quilt she made for my grandson, Britton, and sent it already spray basted, I began to think I was missing something.
So, at the ECMQG meeting last Saturday, I asked for expert help. Cindy and Kim each showed me their method for spray basting and helped me spray baste a couple of quilts - the bookshelf quilt and the starflower quilt.
So I decided to quilt the starflower quilt this week. I have to say, I really like the spray baste. No wrinkles or bumps, despite all the bias edges in this quilt.
I did swirls in the stars and what I called chrysanthemums in the hexagons. It seemed to me to take for-ev-er, but I finally got the main body of the quilt done.
Now, all I have to do is figure out what to do with the borders.
One of the fun things about having such a talented daughter is that occasionally I get asked to do something fun, like test a pattern. This adorable little nosegay pattern was designed by my own sweet girl, known on IG and Flickr as @acraftyfox_amanda. She and her husband own Westwood Acres Fabric, and she not only raises kids, runs a shop, and makes quilts, but she designs them as well. Each month, in the Westwood Acres Fabrics monthly newsletter, she includes a unique pattern that she has designed especially for her customers (in fact, the starflower quilt above was one of her designs!)
This month, it's this cute little nosegay pin cushion. She designed it to be made with Liberty Lawn, but I don't have any, so I grabbed some @annamariahorner Dowry and set to work. In about an hour and a half, I had this adorable little pinnie. If you haven't signed up for her monthly newsletter, you really should. There's a link on the Westwood Acres website. And I think she just may have some Dowry left in the shop.
So, that's what I've been up to. How about you?
My friend Leona asked me to quilt this little mini pinwheel quilt for her, and it was a fun little project. I outline quilted all the little twisters to emphasize the pinwheels, then carried that through to the first border.
I really love the texture the outline quilting gave this little quilt. It feels great as I run my hand over it.
I herringbone quilted the outer border. I really like the rhythm of quilting herringbones, even if they are far from perfect. And I really haven't figured out corners yet. They're getting better, though.
I'm still doing a couple of swaps - the ongoing kind, that I've been doing for a long time. I made this little turtle for my partner in the Sewing With Friends swap. The theme this time was pin cushions. I meant to make this little guy last summer, but I had misplaced the pattern. Finally found it and created this fun little critter. The pattern is Henrietta by Heather Bailey. So cute. And fun to make.
Another swap I started just this year is the Handmade Birthday Swap. I'm in the sewitsyourbirthday group. Since my birthday is in January, I've been receiving fun little gifts for awhile, and when I have them all, I will do a big reveal. In the meantime, this little quilted tool caddy is what I gave to the other birthday girl this month.
I filled it with a few fun little goodies too.
Always before I have pin basted my quilts, but when my sister asked me to quilt the quilt she made for my grandson, Britton, and sent it already spray basted, I began to think I was missing something.
So, at the ECMQG meeting last Saturday, I asked for expert help. Cindy and Kim each showed me their method for spray basting and helped me spray baste a couple of quilts - the bookshelf quilt and the starflower quilt.
So I decided to quilt the starflower quilt this week. I have to say, I really like the spray baste. No wrinkles or bumps, despite all the bias edges in this quilt.
I did swirls in the stars and what I called chrysanthemums in the hexagons. It seemed to me to take for-ev-er, but I finally got the main body of the quilt done.
Now, all I have to do is figure out what to do with the borders.
One of the fun things about having such a talented daughter is that occasionally I get asked to do something fun, like test a pattern. This adorable little nosegay pattern was designed by my own sweet girl, known on IG and Flickr as @acraftyfox_amanda. She and her husband own Westwood Acres Fabric, and she not only raises kids, runs a shop, and makes quilts, but she designs them as well. Each month, in the Westwood Acres Fabrics monthly newsletter, she includes a unique pattern that she has designed especially for her customers (in fact, the starflower quilt above was one of her designs!)
So, that's what I've been up to. How about you?
Monday, July 29, 2013
Catching Up - Part Three
So here we are at the third - and final - installment of my "Vacation Trilogy" - the one about the crafty stuff I did while I was gone.
It's pretty inspiring to have this just down the hall... (Since I was so busy, I didn't take many pictures, so I've swiped Manda's IG photos - she does a much better job at the picture taking than I do!)
I folded a
And got to play with some more... This is Briar Rose by Heather Ross, of course!
I cut and folded this very bundle - so pretty! This is Nordika by Jeni Baker of In Color Order. Isn't it dramatic? Can't wait to play with this!
And helped ship some packages while the parents were gone - but not this many.
And I made this Christmas quilt top. The fabric is Hip Holiday from Josephine Kimberling, and the pattern is Spin Cycle from Allison Harris of Cluck Cluck Sew. It was a beast to cut out, but fun to put together.
I hate trimming blocks, but love the little piles that the trimming creates. It makes such a difference in the finished quilt to have all the blocks the exact same size.
And I put together a couple of quilt tops for Manda. This one was finished, but she wanted to make it bigger. She had all the blocks made so it was a simple matter to put it together. If you want to make one too, this is the Seaside Chevron Hexagon Quilt on her blog. One more finished quilt top in the stash.
I made Abby a couple of little dresses. The pattern is the Geranium Dress by MadeByRae. It's classic and super easy to put together. And very versatile. The fabric is Robert Kaufman chambray. I loved working with it. Such a nice hand. And I think she likes it!
She hadn't worn this one yet, but she picked out the fabric herself. I think she'll like it too.
I managed to get one hexie flower made - which is not too bad considering I only made hexies in the airport while waiting for flights.
I took a weekend pilgrimage to Idaho to visit my friends Carol and Brent. They took me to the Boise Farmer's Market on Saturday. It was really fun. We bought some wonderful fresh-from-the-farm berries. And the fresh-squeezed lemonade was delightful on such a hot day - it was 104 when I was there.
And she very kindly indulged me by taking me to this fun quilt shop down the road from her house. I think I may have converted her - she's planning on taking a quilting class from them in August! (Do I dare say I hope she's hooked??)
And, when I wasn't sewing or playing with the grands, I made a couple of blueberry pies. You can find the recipe here.
And I might have brought a bit of fabric home...
So, that's what I have to show for my vacation. Fairly productive, and lots of fun!
But also very nice to be home.
Subscribe to:
Posts (Atom)


