Saturday, April 9, 2011

Scrapbuster Saturday - Scrappy Bee Blocks and Jelly Roll Scrapbuster Market Bag Tutorial


 Be sure you drop by and enter my Blogiversary Giveaway (week 2) here:


Today's post is all about scrapbusting.  My scraps are running me out.  Some are a decent size, but most are just puny little bits I just don't have the heart to throw away.  At the price of fabric, I just can't give up on them without a fight.

So what do you do with all those little scraps?  I have devoted today to ways to use these little gems and turn them into something useful.


One of the things I've been doing is satisfying my new hexie craving.  Hexies are a great project to keep your hands busy when you're sitting watching TV or a movie.  I do this a lot when I don't want to sit at the sewing machine, for whatever reason.  Aren't they pretty? Before I tried it,  I thought  making hexies would be a real drag, but frankly, they're downright addictive.  And they make beautiful flower blocks.  Check this out...

Since March was my month as Queen Bee, these are the blocks that the ladies in the First Time Bee made for me, except for the three on the bottom, which are the ones I made. Aren't they beautiful?  Won't this make a lovely quilt?  I'm tempted to simply applique them on white squares and call it a quilt.  I think it would be lovely.

The other creative scrapbusting thing I did today was make bee blocks for Kari, who is the April QB.  She requested mod trees for her blocks.  We were to make two blocks, but I was on a roll and couldn't stop.  What do you think of these?


My first idea was a tree with hexie "leaves" but someone beat me to it, so I decided to try Dresden leaves.  I used some of the Kumari Gardens scraps left from the butterfly placemat set I gave to my sister for her birthday.


My next idea was a "Sparse Leaves Tree" roughly based on the Lanterns Bloom tree quilt I made last summer for BD#2, but on a much smaller scale, of course.  I thought about stuffing the leaves like I did on the quilt, but the leaves are just too small for that, and larger leaves would have looked weird.  As it was, I had to cut them down for them to look right.  This project used some of the wasted triangles (I saw someone call them "bonus triangles" - I think I like that) from the Central Park Whirly Wheels quilt.


This started out to be a ticker tape tree using more of the bonus triangles from the Whirly Wheels quilt, similar to the one here.  But once I got this far, I  just couldn't "scribble" on it.  I realized later that the ticker tape was supposed to be background, but honestly, I liked it as it is.  I hope Kari does, too.

The "trunk" of all three trees is left over from the Lanterns Bloom quilt, so these projects were entirely made of scraps,except for the background squares.

And before I get started with the tutorial I promised, I have a question...  How do you store your scraps?  I'd love to know.  First I had mine in a zip lock bag, but they outgrew the bag.  Then I had them in a basket, but they outgrew the basket.  Then I put them in some glass vases (they ARE very pretty, you know) and those are full to the brim.  Just what do you do with all those very pretty, but space-consuming scraps?

Scrapbuster Jelly Roll Market Tote Tutorial

I had a lot of random pieces of the Central Park jelly roll left after I finished the Whirly Wheels quilt, and I had been agonizing over what to do with them until I got the idea for the Scrapbuster Jelly Roll Market Tote.  As promised, here is the tutorial for the tote.

This project can be adjusted based on the scraps you have on hand.  Basically, we are going to start out by creating a "piece" of fabric 30 inches wide by 17 inches long.  How you do this is up to you.  I will tell you what I did and you can adjust accordingly.

You will need:
Jelly roll strips or yardage to make a piece of fabric 30 inches wide by 17 inches tall
A piece of lining fabric 30 inches wide by 17 inches tall or enough pieces to piece together that size
4 additional jelly roll strips 15 inches long
A jelly roll scrap about 10 inches long
A jelly roll strip or yardage strip 32 inches long for binding
A small scrap of velcro
A ruler and/or seam gauge
A pencil or fade-away marker

All seams are 1/4 inch unless otherwise stated.


Since the width of our fabric base is 30 inches, and jelly roll strips are 2 inches wide after seaming, we need 15 jelly roll strips for the top of our bag.  I stacked up about 8 at a time (because that's all my rotary cutter can handle) and cut them 5-1/2 inches long.

NOTE:  I used shorter strips in the next bag, so this is not set in stone.  Use what you have!

Assembly line sew the jelly roll strips together in a pleasing configuration, first in pairs...  then sew the pairs together to make 4...  then sew the fours together and sew on, until they are all joined in one continuous 30-1/2 inch strip, like so:


Iron the seams all one direction from the WRONG side...


Then turn it over and press from the RIGHT side, making sure the seams are fully open and there are no "pleats" in your pieced fabric.


I had a strip of border left from the quilt that was 2 inches wide.  If you don't, that's OK.  Just use another jelly roll strip and factor in the extra 1/2 inch to your calculation.  This makes 6-1/2 inches toward our 17 inch piece.  Sew the strip to the first section you pieced.  I find it is easiest to put the pieced section on top with the seam openings toward me so that the seams don't get twisted as they go under the presser foot.

Trim the 2-inch piece to the correct length when the two sections are stitched together.

Press the seam as before, first from the wrong side, then from the right side, making sure that the seam is crisp and flat.

I had a large piece of yardage left over from the quilt. Since the top of my bag now measures 6-1/2 inches, and I need it to be 17 inches, I need 10-1/2 inches plus 1/2 inch seam allowance is 11 inches for the bottom of my bag.  I cut a piece 30 inches wide by 11 inches.

If you don't have a large piece of fabric, piece your jelly roll strips together horizontally, instead of vertically.  This will give your bag some visual interest.


Sew your bag bottom to the pieced top with a 1/4 inch seam.

Press the seam toward the top from the wrong side, then


turn it over and press from the top.

Matching the top edge, bottom edge, and the two horizontal seams, sew the side seam together with a 1/4- inch seam.  Sew the seam again between the seam you just sewed and the edge of the fabric.  This will give your tote extra strength to carry heavy stuff.

Fold the bag in half with the side seam at one end.  Make sure your bag is flat and that your edges at top and bottom meet.  Sew a 3/8 inch seam across the bottom of your bag.  Sew another seam at 1/4 inch for strength.


Mark the sides of the bag with a pin near the bottom seam; one right at the seamline on the seamed side, and one right on the fold line on the unseamed side.  Fold the bag crossways matching the side seam and the bottom seam and secure with a pin.  Be sure to poke out the corner of the bag where the two seams meet and make sure there are no puckers or pleats underneath.


Lay your bag on a flat surface, and with a ruler or tape, measure 1-3/4 inches from the corner (where the side seam and bottom seam meet-not including the seam allowance).  Take a ruler (you will need the straight edge) and place it perpendicular to the seam gauge.  Place the "0" on one edge of the fabric.  Your line will be straight when the ruler measures exactly 3-1/2 inches on the other side.


Remove the seam gauge and draw a straight line from side to side.  There are all kinds of fancy marking tools on the market, but since this seam is on the inside and will never show, I just use a pencil.


Stitch along the pencil line.

Repeat for other corner, using the side fold in place of the side seam as your guide.

Cut a piece 30 inches by 17 inches for your lining. The piece of fabric I had was 2 inches short, so I just added a piece of fabric to the top edge to make it work.


Construct the lining of your bag in the same manner as the outside, sewing the side and bottom seams and marking and then marking and sewing the lining corners.


With the bag right side out and the lining wrong side out, place the bag lining inside the bag, matching the side seams and the bottom corners.


Pin the bag and the lining together at the top at the side seam and the side fold.


Fold the bag again so the two pins touch each other, and mark both edges with a pin.
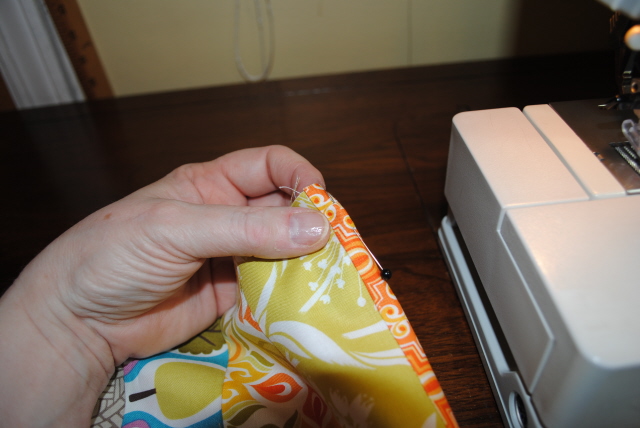

 This pin marks the center of the bag on each side.


With another pin, mark a spot 3 inches on each side of the center pin on each side.  Be sure to pin through both the bag and the lining and that the top of the bag and the lining meet.  You want to make sure your bag fits together nicely at this point, because we're getting ready to finish it up.


From your jelly roll strips, cut 4 pieces 15 inches long.  I like to have 2 sets of 2, but if you want to change it up a bit, that could be fun.


Sew 2 strips together down both sides of your 15 inch strips. Repeat for the other pair of strips.


Using your method of choice, turn the handle sets right side out.  I use a safety pin.  Put the pin through only one layer of the handle fabric...


Gather the fabric along the pin through the middle until the pin comes out the other side, and...


Pull it right side out.


Press each handle along the seam so it is nice and flat.  Sometimes I find that I have to roll the seam back and forth in my fingers to pull the seam all the way out.  Occasionally, I find that I have to use a pin or the point of a seam ripper placed ever so carefully right at the seam line to pull the seam completely flat.  Press thoroughly for a nice, crisp seam.


Top stitch the handles down both sides of each handle 1/4 inch from the edge.


Place the handles on the OUTSIDE of the bag, lining up the edge of the handle with the pin you placed 3 inches from the center.  Since I want the orange to be the outside of the handle, I have the blue facing up. 


Sew the handles on the bag using a 1/4 inch seam.  I like to triple stitch over each of the handles so that they are good and sturdy for carrying my groceries.  To do this, I sew across the handle, press the reverse button, and sew it again, then release the reverse button and sew forwards across it again.


Fold the 10 inch jelly roll strip in half and press.


Now, fold each cut edge toward the center and press.  Be careful not to burn your fingers!


Press it flat along the fold.


Stitch along both sides of the strip.


Cut a piece of velcro about 1 to 1-1/2 inches long and sew the loop side to the strip about 1-1/2 inches from the top by sewing around all 4 sides.


Make sure your jelly roll strip measures 10 inches.  Mine didn't, so I cut it off at 10 inches.


 Fold the end of the strip under about 1/2 inch and stitch the hook side of the velcro to the opposite side of the strip.


It should look like this.


Place the strip with the velcro end right side up at the top of the bag on the lining side of the bag directly beneath the center of one of the handles.  Triple stitch it to the bag 1/4 inch away from the top.


Leaving a tail about 2 inches long, take your binding strip and place it WRONG side down on top of the LINING side of the bag.  (NOTE:  I had a piece of binding left over from my quilt, so my strip was only 2 inches wide.  You may wish to cut your jelly roll strip to 2 inches to make this part easier.)


Start about 1 inch beyond the seam (be sure you backstitch here so your seam doesn't pull out later) and sew all the way around the bag until you get about 1 inch from the seam.  Stop.  Secure your seam with backstitches.


Remove your fabric from the machine and lay the bag on a flat surface.  Match the tail of the  beginning of the strip with the tail of the end of the strip and pin together.


Cut the tails to 1/4 inch and sew the tails together.  Make sure you do not catch any of the bag fabric in this seam.
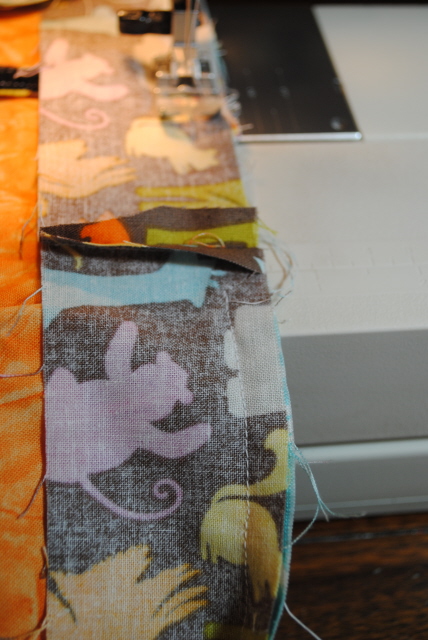

Take your bag back to the machine and sew across this small space, sewing the seam open.  If you wish, take your bag to the ironing board and press this seam so that the seam allowance and the binding go UP, away from the bottom of the bag.  (I do not press here, but some people might find it easier to press it now.)


Fold your binding so the raw edge of the binding snugs up to the raw edge of the bag. This should approximately fold the binding strip in half.  Again, you may wish to press this fold in the binding in place, but I do not.


Fold over again to enclose the raw edge and stitch close to the edge all the way around making sure the binding covers the previous stitching and backstitching before cutting your threads.


Voila!  Your bag is complete.  Cute huh?  And the variations are endless.  I made another one that looked like this...


I didn't have a big enough piece for the bottom, so I pieced it to make it 17 inches long.  Since I already had a break in the fabric, I decided I didn't want the blue strip in it, so I added just a folded piece of fabric instead, kind of like piping, but without the cord.


Want it wider or deeper, just vary your measurements accordingly.


Keep your little bag rolled up in your car or purse and then pull it out when you get to the store.  Great for the environment and lots more fun for you to have a cute little bag rather than some plastic monstrosity.  Make a bunch and use them for all your shopping.  Make a bunch more and give them away.  Your friends will appreciate a cute little bag too, I'm sure!


This project is fast and easy.  It took longer to make these two for the tutorial, of course, since I was taking pictures and I had to stop more to think about what I was doing, but I made the first bag in less than an hour.  I'm finding I have a new appreciation for projects like this that I can finish in an evening after work.

Also, if you have any questions or something doesn't make sense, please let me know.  I was on a roll with this tutorial when the computer crashed, leaving several steps and photos unsaved.  I think I re-did them all, but let me know if I missed one.

I hope you enjoy making and using this Scrapbuster Jelly Roll Market Bag!


Friday, April 8, 2011

Friday Again = Blogiversary Giveaway 2


It's already Friday again and time to list the Giveaway for Week 2.  This week, my blogiversary present to you is a Sunkissed charm pack and (as promised) the Central Park Scrapbuster tote I created yesterday.  I love Central Park (as you know by now, I'm sure), and Sunkissed comes in as a close runner-up.  There are some prints in this line that I just can't get enough of.  I haven't sewn much with it yet - I've used one piece, I think - but it is really lovely fabric.  I think I'm going to have to make sure I get some more before it is all gone.

I really had fun with the giveaway last week.  People left such great comments.  It was so much fun to read them.  I really felt like I wanted to have a conversation with so many of you.  I tried to reply back to everyone.  I really do appreciate your visit- and your comments.

So, to win this week's little giveaway:

1.  Leave a comment on my blog and tell me about your favorite blog post during this past week - mine or someone else's (and if it's someone else's, if you can leave a link or directions to the post, I'll go check it out).  I've really enjoyed visiting new blogs during the last week too. 
2.  For another chance to win, just become a follower (or if you already follow) and leave a comment to let me know.
3.  If you have a blog, mention this giveaway on your blog, and then come back and let me know, and if possible, leave a link to your post.  I'd love to come visit your blog too.

So, winning is easy peasy.  I'll post the winner of last week's giveaway in an update to this post sometime today.

UPDATE AND WINNER:  I just realized I'm going to have to figure out how to number the comments because counting them while scrolling is more difficult than I had imagined. (I saw a post on someone's blog about that recently...  Wish I'd paid attention.)

Anyway,I had my husband pick a number between 1 and 42 (kinda like the way I used to choose winners when my kids were little...  and no, I didn't tell him why - he he) and he picked 22.  And if I counted right, the 22nd comment was LETHARGIC LASS  who said, "I am a follower."  (I'm pretty sure that was #22).  

But she probably would have won anyway if I was picking my favorite post for her next comment, which was, "As for you and your blog... I adore Abby :) That picture could being world peace :) As well I love that, like me, you are addicted to making the hexie needlebooks and addicted to giving them away LOL."

Lethargic Lass -I adore Abby too!

So anyway, Lethargic Lass is the winner of the Central Park charm pack and a special surprise.  Email me your addy and I'll put your gift in the mail on Monday.

And thanks to everyone who commented on last week's post and everyone who follows my little blog.  Good luck in round 2.

Oh, don't forget, my 100th post is coming up very soon...  HINT.  HINT.


And thanks so much for visiting.

Thursday, April 7, 2011

Sneak Peek - Scrapbuster Jelly Roll Market Tote... coming soon


Don't forget that this week's giveaway - a Central Park Charm Pack (and maybe a little surprise) - ends tonight at midnight!

I love sewing.  I love quilting.  I love stash building (a/k/a fabric therapy).  What I'm not sure I love is scraps.

I have to admit that recently my scraps have come in handy.  In fact, they've been very useful.  When I made my mini QT quilt, I used the scraps from two other projects to make my mini mini quilts.

Kumari Gardens mini mini quilt

Bliss mini mini quilt

I also used scraps to make the decorative borders on the towel and the pot holders for my sister's birthday gift.


But frankly, the scraps are driving me out of house and home - or at least my sewing space. There are just so many of them.  And they really are taking over.


So I've decided that I'm going to devote one Saturday a month, both in my sewing and on my blog, to scrapbusting.  Surprisingly enough, I'm going to call it Scrapbuster Saturday  (catchy title, huh?  =P  ).  I'm going to try to come up with fun and innovative uses for my scraps, and I'll share them here.

Here is a sneak peek of this month's project and tutorial - a jelly roll market tote made with the scraps from the Central Park Whirly Wheels quilt.


And even better, the tote and a Sunkissed Charm Pack will be the giveaway for next week's celebration of my blogiversary.

I think the tote is pretty cool, even if it is something I designed myself.  It used only scraps, it holds two large boxes of cereal in addition to a half dozen or so other items, and it rolls into a tidy little package until you are ready to use it. 


So be sure you leave a comment on this Friday's Blogiversary post to enter for your chance to win the Jelly Roll Market Tote and a Sunkissed charm pack.

And I noticed that I'm nearing my 100th post.  You might want to comment on that one too.

Just sayin'...

Wednesday, April 6, 2011

Progress on the MIAGIA Crazy 9-Patch Quilt Top, Mini QT Received, and Other Updates

These blocks have been haunting my dreams, and yesterday morning I woke up with an urgent need to work on this quilt top. A few days ago, I asked for advice on colors to sash these  blocks made with random donated fabrics.  I got some great comments, both on Flickr and on my blog post.  One wonderful reader actually took my block post and magically (using a new Flickr tool I don't understand quite yet) placed my blocks in various colored sashing so I could see what it looked like.  You can find her photo here.  How cool is that?  I was really drawn to the blue/aqua photo, but I just couldn't quite commit...  Until Mrs. Darling and Sister of the Divide both suggested in my blog comments that I use both.  Aha!  That was the inspiration I was waiting for.

And it's been bugging me ever since.

I have never done cornerstones before and was puzzling it out in my mind when I went to bed night before last (in the middle of a crazy-wild thunderstorm, I might add) and when I woke up, I wanted to sew in the worst way.  Sadly, it had to wait until I got home from work.  I have other projects with deadlines, but this is the one that I chose to work on.  I still have sashing to add to two sides, and then I think it needs some borders to make it a more usable size, although it might make an OK kid's quilt the way it is.  Still, I think I'll add at least one border to tie the whole thing together.  There is still a LOT of that argyle print left.  Doesn't really go with my aqua/orange sashing, but it IS in almost every quilt block.


I've got to get to work on my Make Mine Modern project.  You send your secret partner 1-1/2 yards of fabric you think she'll like plus an item to decorate their sewing room and a handmade item.  I've pretty much known what I wanted  to do for my partner for weeks, but I just can't make myself sit down and do it.  Now I'm wondering why.  Anyway, I'm down to the wire - the deadline to mail is April 15, so I've got to get moving.  And BD #2 will be home next week, and I know I'll be distracted, so I had better get this done.


 In other news, I received my 3-D Mini QT quiltie from my partner, Valery Anne.  It's adorable.  It's stamped, painted, stitched and beaded, with great embellishments, like felt leaves and star buttons, and a cute hand-painted (?) birdie.  Great work!  I have a little wall space in my sewing room and I'm going to make it a home there.

I hope she gets my creation soon, because I'm excited to share.  I think it just might be my most creative work yet.  I showed it to a co-worker, and she commissioned one for herself, so I'm pretty excited about that.

I'm not sure how I managed it, because I really thought I had signed up for the next round, but I must have been delusional, because I actually REMEMBER signing up, but apparently I did not.  So I'm sitting out this round, which is probably OK, since I'm doing several other swaps and I have several quilt tops I want to finish. 

But alas, now it is time to go to work.  TTFN!

Sunday, April 3, 2011

No-Baste Appliqued Hexagon Needlebook Tutorial

Angela, of My Three Sons, has this great tutorial on her blog to make hexi needlebooks.  They are so cute and fun, I thought I'd try it.  Thanks, Angela, for such a great idea!

First I made these three...


Then I made three more...


Then I made this one to send off in a swap before work one morning.  Twenty minutes flat, If that long...


So I thought I'd share my super quick, no baste method.

Angela says she uses a 1-1/2 inch hexi template.  These are 2-3/4 inches on the Outer Hexie with the seam allowance (the length down one side) and 2-3/8 inches finished so they are about twice the size of Angela's creation.   I'll try to post a pdf template tomorrow.  I thought about putting a pocket with a flap in the back for a pair of embroidery scissors, but I haven't done that yet.  Maybe the next one...

Angela used super cute fabric for her outside hexie.  I didn't have any super cute fabric, but I did have a yard of Sew Now, Sew Wow! so I decided to use some of the motifs as appliques.

Applique is easiest if the fabric is stabilized....  And that is how I came up with this no-baste variation on Angela's great idea.


You will need:

A scrap of fabric big enough to cut 2 of the outer template
2 pieces of felt
A 3/4-inch "D" Ring
A piece of Interfacing
Your applique motif
A scrap of Heat N Bond or other double-sided fusible
A hot iron


This tutorial uses two sizes of hexi templates.  Mine are 2-3/8 inches along one side for the Inner Hexie and 2-3/4 inches along one side for the Outer Hexie.


Choose a piece of fabric for the outer hexie that is big enough for your Outer Hexie template.  I chose a scrap of yellow Kona cotton.  Cut out the template along the inside of the line.


Cut 2 pieces of interfacing using the Inner Hexie template

Fold one piece of felt so it is just big enough to cut 2 of the Inner Hexie pieces from it and cut them out along the inside of the line.


Fold the other piece of felt so that the side of the hexie template with the two lines marked perpendicular to the edge is about 3/4 of an inch away from the fold.  Pin in place so it doesn't squirm around.


Cut 2 lines perpendicular to the fold being careful not to cut into the template pattern.


Leaving the center of the fold intact, cut out the Inner Hexie pattern.


Choose an applique motif and cut LOOSELY around the image leaving at least 1/4 inch all the way around.

Now that you have all your pieces, head to your ironing board.


Iron the interfacing onto the inside of your Outer Hexie fabric.


Fold the seam allowance of the Outer Hexie inward along the edge of the interfacing.  When pressed in place, the interfacing gives just enough stabilization that you don't need to baste.

Press all 6 sides in place for both outer hexie pieces, folding along the edge of the interfacing and pressing a crisp fold.

 Turn it over and press it nice and flat with good crisp edges.
 

Cut a piece of Heat N Bond slightly smaller than your applique motif- just a fraction so it doesn't leave a mess on your iron and ironing board.

Fuse them together.

Peel off the paper backing and fuse the applique motif onto the outside of one of your Outer Hexie pieces.

Head to the sewing machine.

Set your machine up to applique.  Since this project is probably not going to be washed, a raw edge, straight stitch applique could work very well.  I thought I might carry mine around in my purse, however, so I am going to choose a narrow zig zag stitch to help prevent fraying.

For this project, I set my stitch length at 1.0 and my zig zag at a width of 3.0.  I don't have to adjust my tension to applique cotton on my machine, but you may want to check your tension.  For an attractive applique, you want to make sure that the bobbin thread does not pull up to the top of the fabric.  If your machine has a needle-down function, select it now.

I want to stitch right along the outer edge of my applique motif.  The interfacing and the Heat N Bond stabilize the Kona enough that I don't have any trouble with puckering.  This is easy peasy.


When you come to the corners, leave the needle down and turn the corner. I turn my project clockwise when I sew, so for an outside corner, the needle should be down on the right side of the fabric, or the outer corner of the motif.  For an inside corner, the needle should be down on the left, or the inner corner of the motif.  This way, the stitches overlap slightly and give good coverage without a lot of extra bulk or lumpiness.  Trim your threads and make sure the edges of your Outer Hexie are still crisp.  If not, a quick press on the ironing board will make the next part easy.

Layer your inside "lining" together with your outer hexie.


Line up your edges as closely as possible.  Pin if you are so inclined.  I don't pin because I find that the bulk of the felt tends to distort the way the two pieces match up and makes it harder instead of easier.

Stitch closely around the edge of the Outer Hexi with the applique motif.  My applique was perfectly sized so I did not sew over the applique when joining the Outer Hexi to the felt lining.  I sew about 1/8 inch from the edge.


Repeat for the Outer Hexie back.

Scrunch up the middle felt piece and stuff it inside the D-ring...

So it looks like this {this is the part I always forget.  I don't know how many of these I've had to take apart because I've forgotten the D-ring - look at the pink needlebook above... notice something missing?  Yes, I fixed it before I sent it off, but as I said, it was before work and I didn't have time to take another picture...  dumbness memorialized for all time =(  }.

We're on the home stretch now...  Select your needle down feature again, layer your three parts together as shown and...


Sew together along the edge with the D-ring.

When you get to the corner, leave the needle down, turn it around and stitch back over where you just sewed.  This forms the "hinge" on your little book, so you want it to be good and sturdy.

Voila!  One no-baste hexi needlebook.

Thanks, Angela for a great idea.

Saturday, April 2, 2011

Block Party Saturday

Christmas Fabric Bee - March Blocks for Fairly Merry
I got a little behind on my bee blocks so I spent today getting caught up.  I promised the March blocks would be in the mail by Monday, and I'm glad to say that I will make that goal.  These blocks turned out beautifully, although I was a little bit intimidated by the Flying Geese blocks.  They weren't as difficult as I thought. Fairly Merry turned us on to a great tutorial here.  Look at the lovely fussy-cut centers!!  My sewing machine hated those thin little corners of the HSTs and gave me fits, but I finally got them done.  Now I know why I usually use the divide-the-square method.

Christmas Fabric Bee - March blocks for Singings
At first, these blocks for Singings were sooooo easy. They were very straightforward, and Singings sent detailed instructions.  The squares went together beautifully.  And then came the slice and dice.  Singings asked specifically that the center strip be lined up straight.  THAT was the difficult part.  That silk is just so slippery.  I lined it up on the cutting board, but by the time I had sewn it, it had slipped.  I have to admit that all my this-is-too-easy cockiness went right out the window the third time I took it apart.  But it's a beautiful block - sooooo elegant - and will make a beautiful quilt. 

Christmas Fabric Bee - April blocks for spontaneousthreads
Stephanie (spontaneousthreads) asked for mod mosaic blocks.  These were really a struggle for me.  I think my problem was that I wanted the angles, but when I went to trim the pieces they were much smaller than I originally planned.  If I ever do this technique again, I'll make sure to allow for the angles and the trimming.  This technique seems to waste a lot of fabric, and I really hate that - something in my early upbringing, I think.  I didn't have enough sashing to sash the outside.  I think I used too many pieces. But overall, I am happy with these blocks.  They are bright and colorful, and should be beautiful.  I love the sparkly white sashing and it wasn't difficult at all to work with.  Nice.

So, all-in-all, it was a pretty productive Saturday.  I started the morning setting up for the Opera Ball, which I didn't attend.  Stopped by JoAnn's for an invisible zipper foot (where do those things go? and the fabric to finish the MIAGIA quilt.  Watched part of one session of General Conference (will pick the rest up later on the Net.)  Took WH to the movies for his birthday, which is Monday.  His choice was Lincoln Lawyer with Matthew McConaughey.  Josh Lucas, who plays the prosecutor, drove me crazy because I couldn't remember his name or where I'd seen him.  I looked him up when we got home - he was in Seconhand Lions, which is one of my favorite movies.  So quirky.  Anyway, Lincoln Lawyer was a pretty entertaining film.

Not a bad way to spend a Saturday at all.

Friday, April 1, 2011

A Year in Blogland

This is Abby in her favorite doggy shirt, saying "hi" with both hands!


Last year, on April 1, I created my blog and my first blog post.  It was exactly 2 sentences long.  It was succinct.  It was cynical.  It was necessary.

I had to be able to comment on my grandbaby's photos.  (THAT is what I call necessary.)

It took me another 5 weeks to create a second post.  

And the next one was 3 months after that.

And here we are 94 posts later.

In a well-ordered world, my blogiversary would have occurred on my 100th post. That just didn't happen.

In a well-ordered world, I would have had something special planned for my blogiversary, and have had a big build-up leading to the big reveal. 

I do not live in a well-ordered world.

However, I do have something special planned.  Every Friday in my blogiversary month, starting next week, I will have a giveaway.  I have some charm squares put aside for just this purpose.  There will even be a special giveaway on my 100th post - whenever that is.

So what do you have to do to win?  I think each week will be different, but for April 8...

1.   Leave a comment on this post and tell me what you like about blogging and/or reading other people's blogs.  Or, alternatively, you could tell me why you don't blog or don't like blogging.

2.  For a second chance to win, become a follower of my blog, and comment to tell me so.

3.  For a third chance, browse through my little blog and leave a comment telling me something you found that you liked - either something I've created or something I've blogged about.  You have 93 possibilities.  (Hopefully there is something here to enjoy - I hope!)

That's it.  This giveaway closes next Thursday, April 7 at midnight.  The winner will be announced before midnight on Friday, April 8. I will post the winner on the blog, and I will try to email you if I can find your email address.

And a new giveaway will start next Friday and end the Thursday after that, and so on, all month long.

Oh yeah, what is this week's charm pack?  Central Park, by Kate Spain.  I've used it a lot lately, and I love it.  The fabric is polished and smooth and delightful and has such a lovely hand, and the colors and designs in the fabric are so refreshing!

No, sorry.  Not the quilt. I've already given that away.  But isn't the fabric wonderful?


Good luck!  And thanks for reading this little blog.